Worksheets
Worksheets enhance metadata reporting by offering flexible search and browse capabilities. You can create worksheets, search metadata, apply filters, and select from various object types to optimize the data in the worksheets. Worksheets support detailed filtering using multiple properties and object types, providing you the ability to manage and derive results. The detailed filtering option supports all objects in a database and lets you create custom worksheets with multiple parameters to show detailed combined results.
The Worksheets module uses multiple organized panes that lets you explore the available worksheets, apply filters, view filtered data and properties, and share worksheets with other users. Shared worksheets are dynamically updated as and when they are edited and submitted.
To view worksheets, on the application menu click ![]() (Worksheet).
(Worksheet).
The Worksheet module appears and displays different panes that let you select, filter, and manage your worksheets.
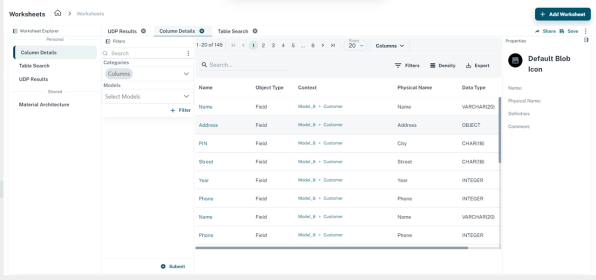
The following list explains the usage of different panes in this module:
- Worksheet Explorer
-
This pane displays the custom worksheets you created and those shared with you. Selecting a worksheet displays filter options and detailed results. To add a worksheet, refer to the Adding Worksheets section.
- Filters
-
This pane enables you to search for data available in the erwin ER360, and categorize your search results based on database objects, selected models, common and object attributes, and user defined properties. Based on the filters you set, the results are displayed in the details pane next to it. To know more about filtering data, refer to the Filtering Worksheet Data section.
- Properties
-
The Properties pane displays properties of the objects selected in the details pane. This pane is collapsible, and the list of data displayed here varies based on the selected object type.
Adding and managing the worksheets involves the following:
To add a worksheets, follow these steps:
- On the Worksheets page, click Add Worksheet.
The Add Worksheet page appears.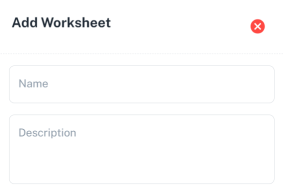
- Enter a name and description for the worksheet.
- Click Save.
The new worksheet is added to the Worksheet Explorer pane.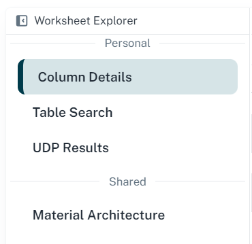
You can also add and open multiple worksheets simultaneously and toggle between them.
Once you have created a new worksheet, you can set up custom filters and save the worksheet. The Filters pane provides detailed filter options to derive optimized results by searching available data, filtering using database objects and different categories, common and object attributes, and user-defined properties.
To filter worksheet data, follow these steps:
- Select a worksheet.
- In the Filters pane, use the following options to filter the data:
- Search
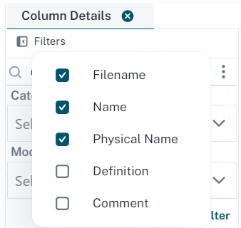
Use this option to search for any data in your catalogs. You can search columns, tables, definitions, comments, or physical names of any models in the repository based on the search keyword.
Additionally, click
 to view more search filters to refine your search results. Select required objects from the list to search only based on the selected objects.
- Categories
Use this option to filter search results based on the available objects in a model. Selecting a category narrows the search results within one or more selected objects. For example, when you select Tables in the Categories list, the search results display only tables that contain the search keyword.
The screenshot below displays table specific search results with the keyword "cust" in it.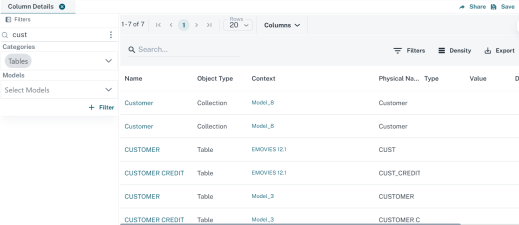
If you do not select categories, results are filtered for all the objects by default.
- Models
Use this option to filter search results based on the selected models. By default, the results are filtered for all the models available in the erwin ER360.
- Additional Filters
Use this option to filter search results based on the selected common and object attributes, and user defined properties. You can add multiple filters based on your requirement and use operators to filter results.
To add additional filters, click + Filter. Then, select the required options from the list.
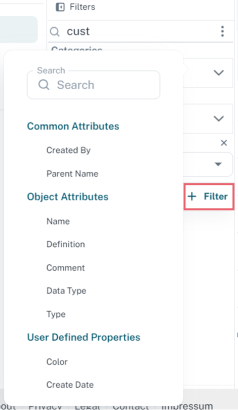
- Click Submit.
The filtered results are displayed in the pane next to the Filters pane.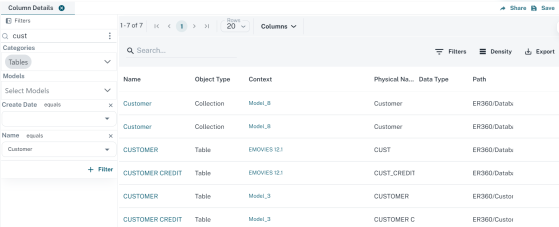
- Click Save.
This saves the worksheet with the filter that you have configured.
Once the search results are filtered, in the details pane, you can use the following options to refine the results:
- Columns
-
Use this option to view filtered results in a list or grid view. Additionally, you can sort the data and choose to display the relevant columns for the filtered results.
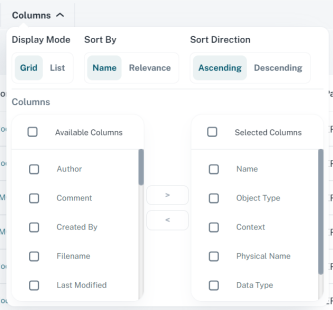
- Search
-
Use this option to search within filtered search results. Enter a keyword in the search box to view results based on the keyword.
- Filters
-
Use this option to filter search results based on a column using operators.
-

- Density
-
Use this option to view the filter results based on you accessibility needs. You can choose Compact, Standard, or Comfortable view. The Compact view reduces the space between the rows, while the Comfortable view uses more space to display the results.
- Export
-
Use this option to export search results to a CSV file or print them.
You can share the custom worksheet you created with other users and view worksheets that are shared with you.
To share worksheets, follow these steps:
- Select a worksheet, and click Share.
The Share worksheet page appears.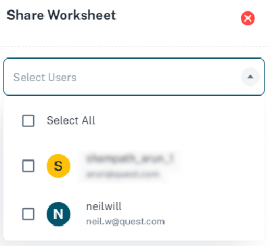
- Select required users.
- Click Save.
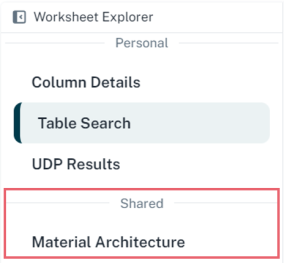
The worksheet is shared to the selected users and displays under the Shared section.
The worksheets that are shared with you by the other users are displayed under the Shared section in the Worksheet Explorer pane.
Apart from creating and sharing worksheets, you can edit the worksheet's name and description or delete them.
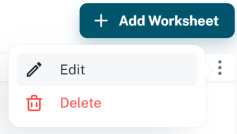
To edit or delete worksheets, click ![]() .
.
The following options appear.
-
Edit: Use this option to edit the name and description of the worksheet.
-
Delete: Use this option to delete the worksheet.
|
Copyright © 2025 Quest Software, Inc. |